Overview
Beam now supports selecting files directly from CompanyCam for projects that are synced through the integration. This allows you to easily attach photos and documents from CompanyCam when working in estimating, invoicing, and billing flows.
1. Connecting your CompanyCam account
To use CompanyCam files in Beam, you must first enable the CompanyCam integration.
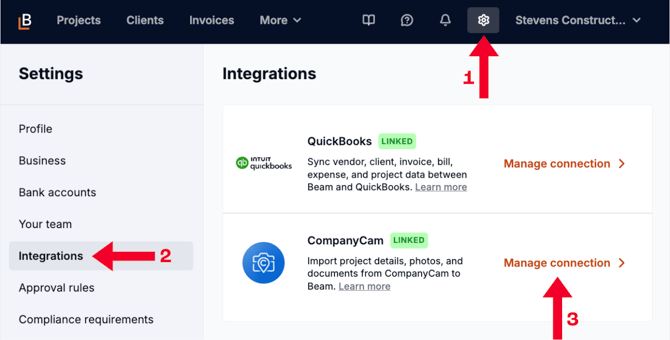
- Click the Settings ⚙️ button next to your company name in the top navigation bar.
- Select Integrations from the side bar on the left.
- Click Connect next to the CompanyCam tile. This will take you to the CompanyCam sign-in screen to enter your credentials.
- Once connected, you'll see a Linked tag next to the the name.

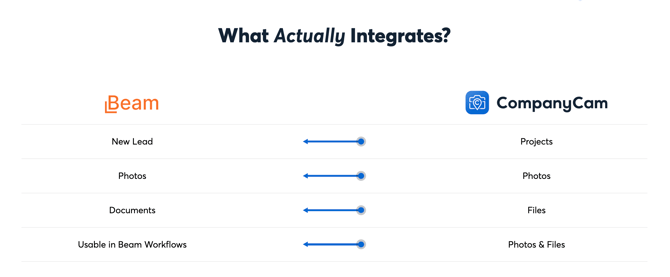
2. How Beam imports and matches CompanyCam projects
- Project name
- Address (including slight address variations)
Beam only imports CompanyCam projects that have an address. If a CompanyCam project only has coordinates and does not include an address, it will not be imported into Beam.
Once a new project is created in CompanyCam, refresh your Beam page. It will automatically become a new project categorized as a Lead in your Projects view (it will use the same name & address as what you've input in CompanyCam).
3. Manually linking projects
To manage the CompanyCam integration, navigate to your Settings ⚙️, select the Integrations tab on the left, and click the Manage connection button.
From here, you'll see a list of all linked projects where you can change the specific project connection by clicking the Edit button to the right of the Beam project name. In order to change the linked project, you'll need to delete the current project connection, then you can type in or select from the Beam projects listed in the dropdown.
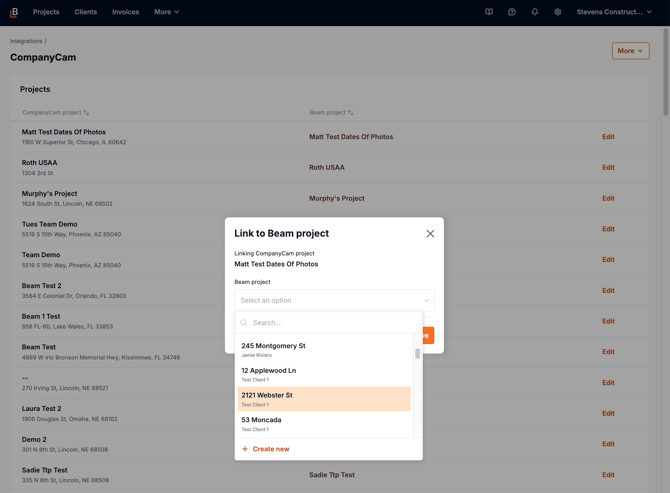
Beam and CompanyCam projects are matched on a 1:1 basis. It is not possible to link two CompanyCam projects to the same Beam project, or vice-versa.
4. Adding CompanyCam files to your workflows
You will now see a CompanyCam tab within a given linked Beam project, and you can now select CompanyCam files anywhere where a file upload box is present on CompanyCam linked projects. For most, this will be useful in the following areas:
- Estimating
- Invoicing
- Bills & Expenses
- Updates
How to add files:
- Open a supported workflow.
- Select the option to Add attachments.
- Choose CompanyCam as your file source.
- Browse and select photos or documents from your CompanyCam project.
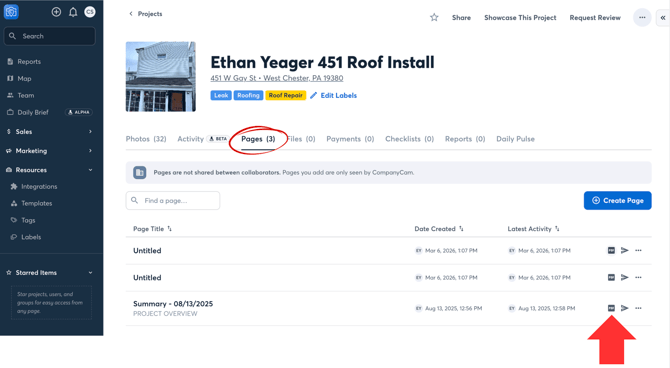
What if I want to see Pages from CompanyCam?
Pages in CompanyCam are where AI-generated notes are stored. If you’d like to use a Page as a starting point for your estimating workflows, you can export it as a PDF. That PDF is then converted into a File in CompanyCam, which will be imported into Beam and can be used as the foundation for your proposal generation process.
What if I don’t use CompanyCam?
If you don’t have the CompanyCam integration enabled, nothing changes. You can continue uploading files as you normally would.